DIY a Height Adjustable Storage Shelving Unit
|
Time to read 2 min
|
Time to read 2 min
Hello, DIY enthusiasts! Welcome back to Allprives DIY blogs.
In today's blog, we're going to make a storage shelving unit with height adjustment. Whether you're organizing a small apartment or a spacious garage, this DIY project offers both functionality and flexibility. Let's dive in and transform your space with a customized storage solution that's as practical as it is stylish!
L1190mm * W390mm x3
L690mm *W390mm x1

Now that we have all the materials ready, let's move on to the storage shelving unit process!!!
To give the shelf a vintage look, I paint the boards dark walnut.
Here's a tip for wood painting, if you want the wood to be darker, you can repeat the painting process until you get the color that you're satisfied with. But only to wait for the previous paint to dry before overlaying another layer.

During the wait of drying the boards, we can do some preparation work. Just like the picture, we screwed hex cup nuts and hex nuts on one end of the rods to serve as the frame legs.
Screw the hex nut first and then go to the hex cup nut. Don't wait until you have tightened the cup nuts to realize that you forgot the hex nut. That would be a long distance from the top to the bottom. (Ahem, I didn't😥)

After the boards are dried, and the rods are tightened, we can now install the shelf.
Pass the 6 rods through the baseboard, and then fix it with 6 hex nuts. Repeat the installation process to the second and third layers.

Adjust the height according to the basket or box you want to place in. I put a basket in the bottom layer, to take out the basket, we need to leave some space on the basket.
Make sure all six rods are parallel to a horizontal surface.

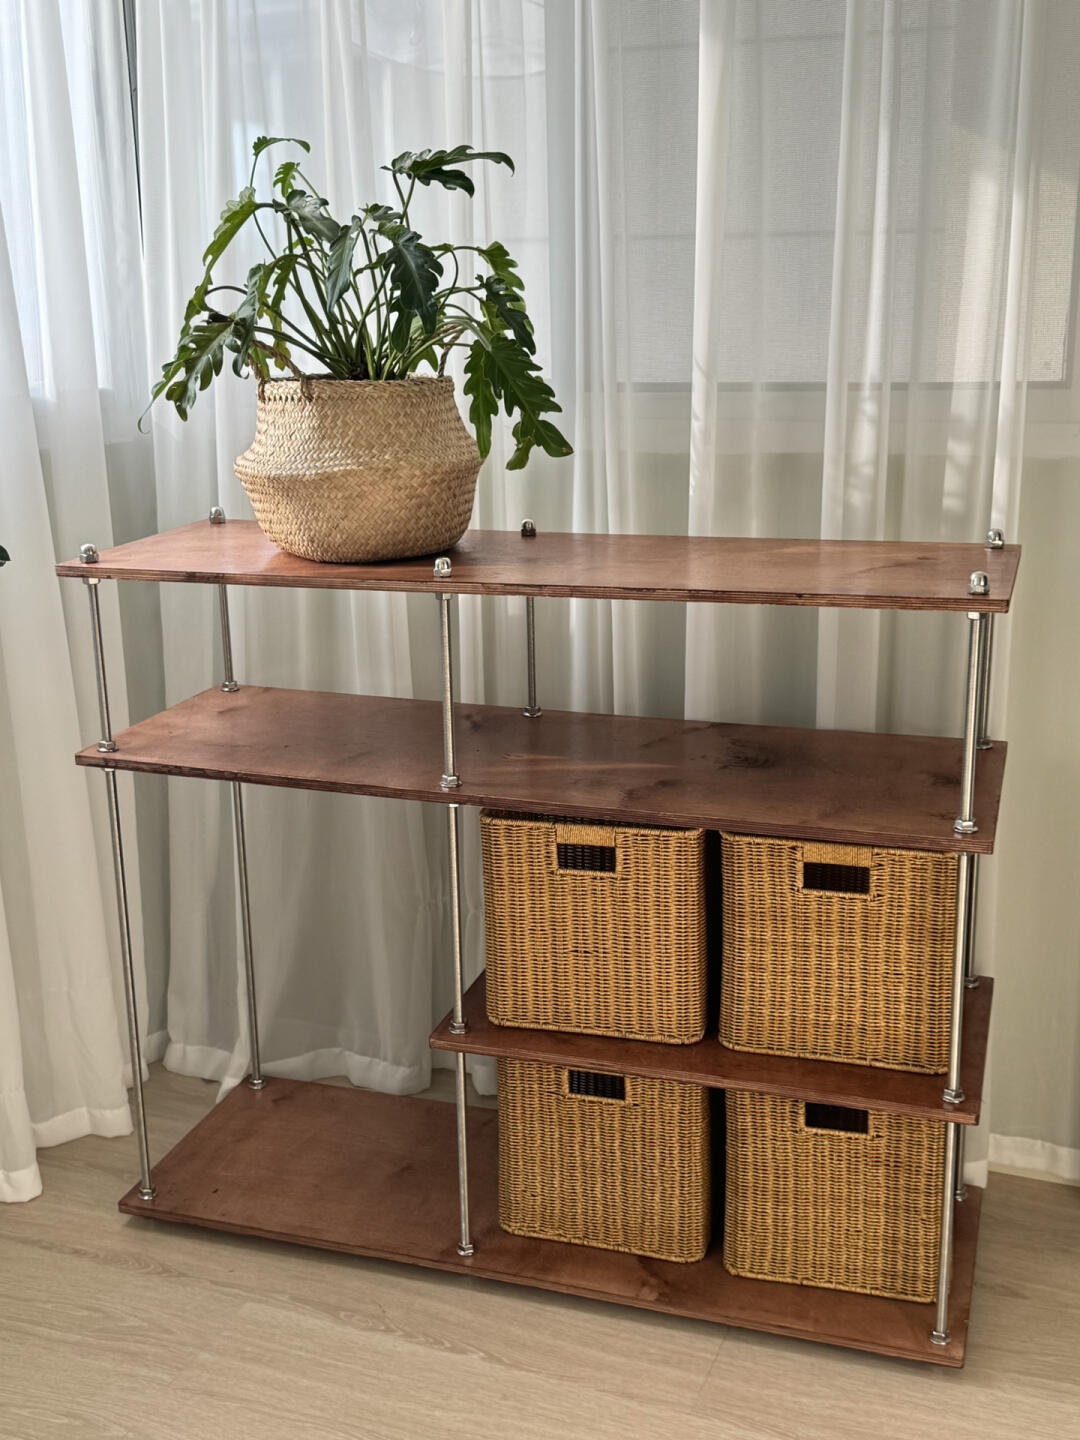
Now we have completed the storage shelving unit, let's take a quick preview.


And there you have your very own height-adjustable storage shelving unit! As are made of stainless steel rods, there is no need to mention the load-bearing capacity of this shelf. You can also adjust the height of the shelf at any time according to your needs to place higher or lower items or add more layers.
Subscribe to our e-mail to get more DIY ideas. Making your home a little bit better, one project at a time.


